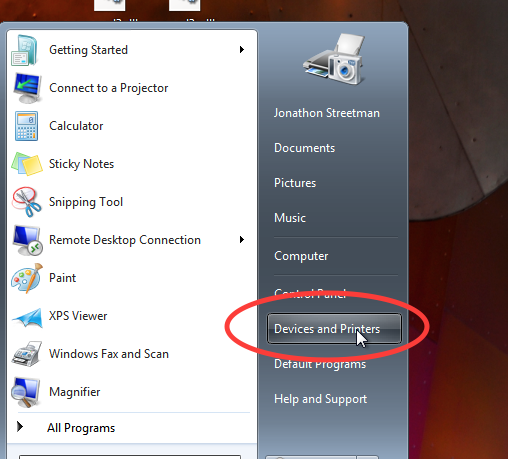
Click Start -> Devices and Printers

Click on Add Printer
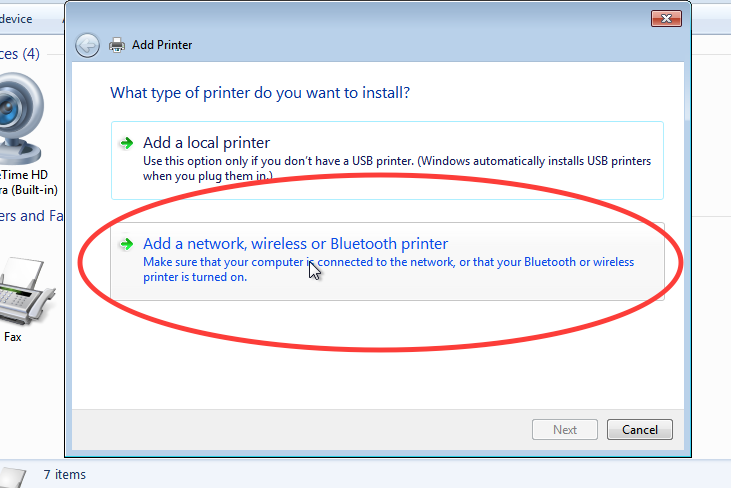
Click on Add a network, wireless, or Bluetooth printer…
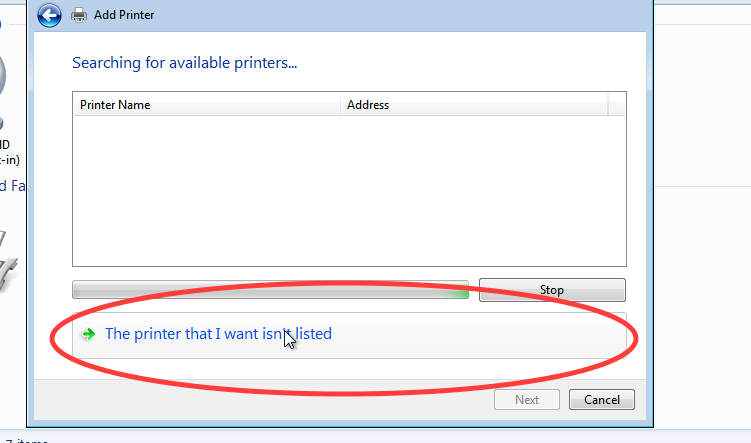
Click on The Printer that I want isn’t listed…
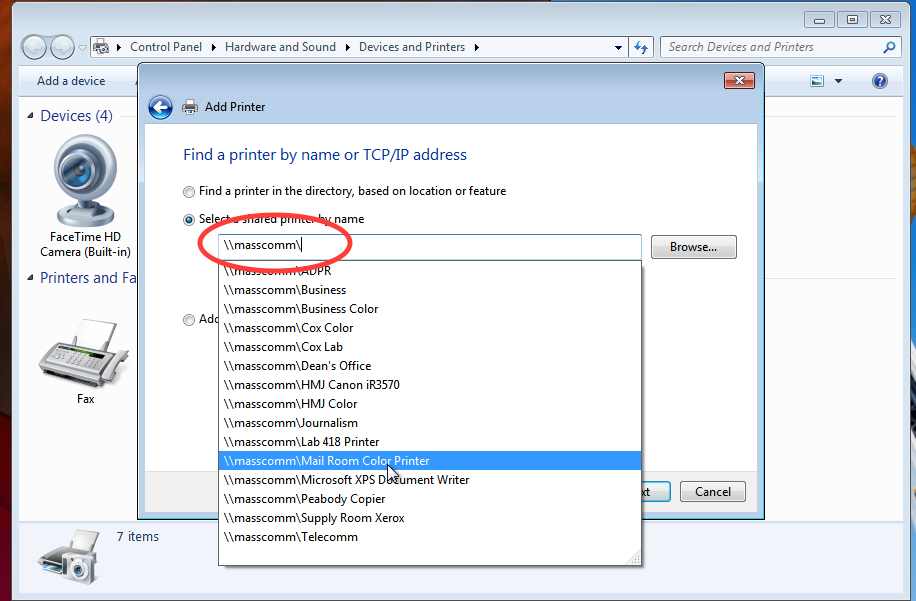
In the box seen above, type \\masscomm\ and you will see a list of the available printers populated.
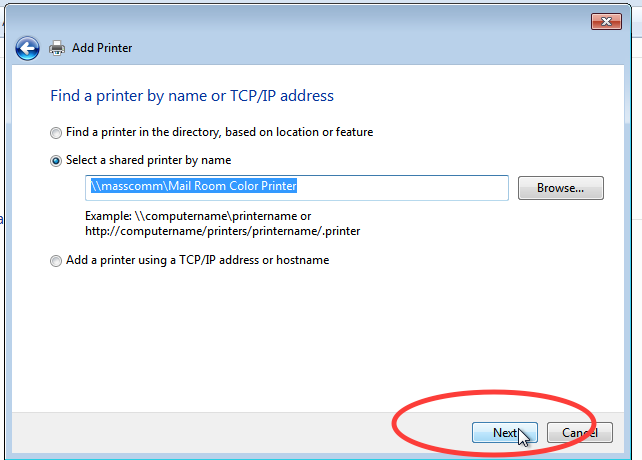
Select the printer you would like to add and click Next.
Follow through the following steps of adding the printer driver and be sure to uncheck “Make this printer my default printer”. After doing this the printer will be added to your computer.
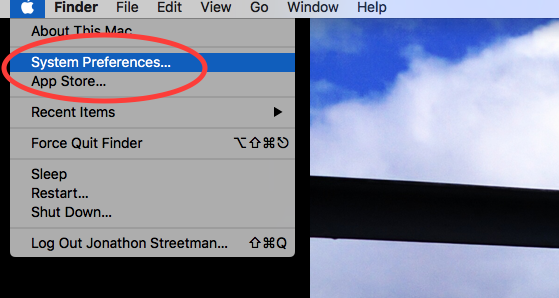
-=MacOS Instructions-=
Select the Apple Logo in the top left of your OS and click on System Preferences…
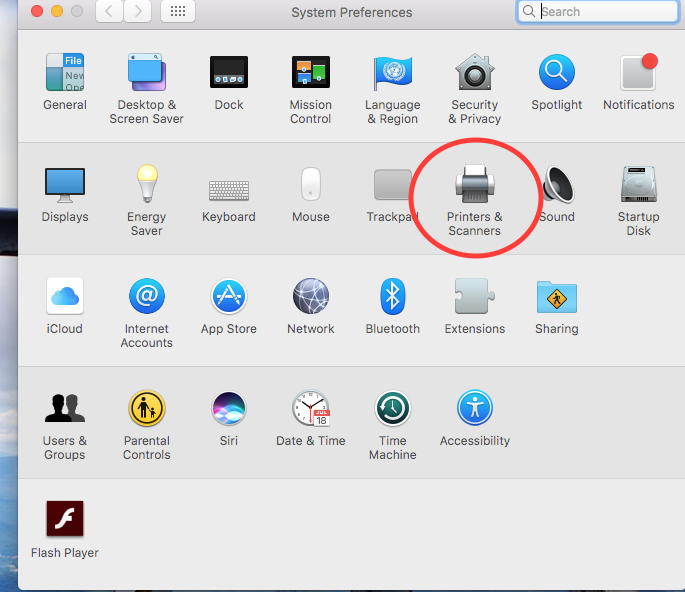
In the System Preferences window that opens, select Printers & Scanners.
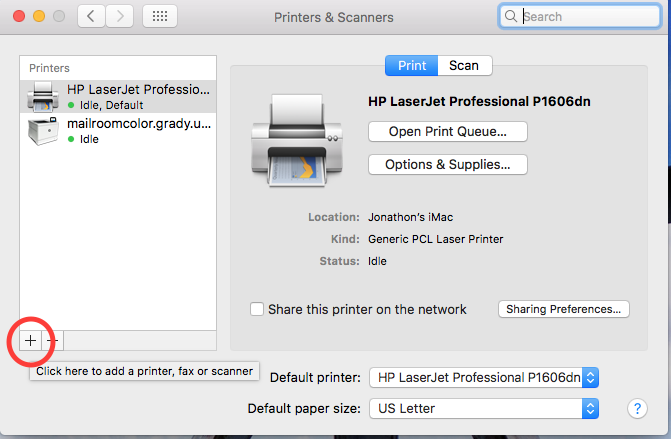
In the Printers & Scanners window that opens, click on the “+” sign in the bottom left to add a new printer.
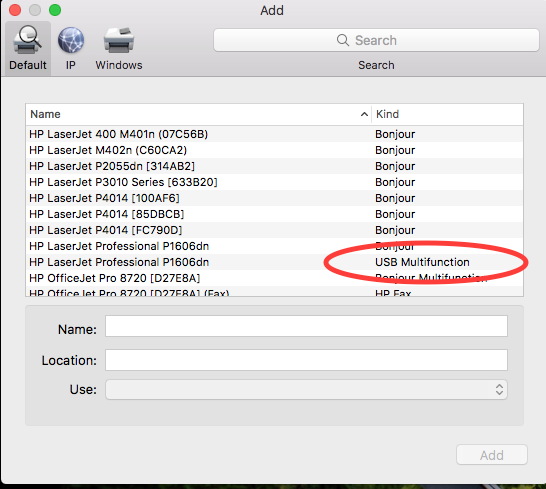
To add a local printer connected via USB (in your office) then you will need to scroll down until you see a printer with your model number listed with the kind of “USB Multifunction”.
To add a network printer you will need to click the “IP” tab and type in the DNS name of the printer you want to add. The image below has the address the the mail room color printer.
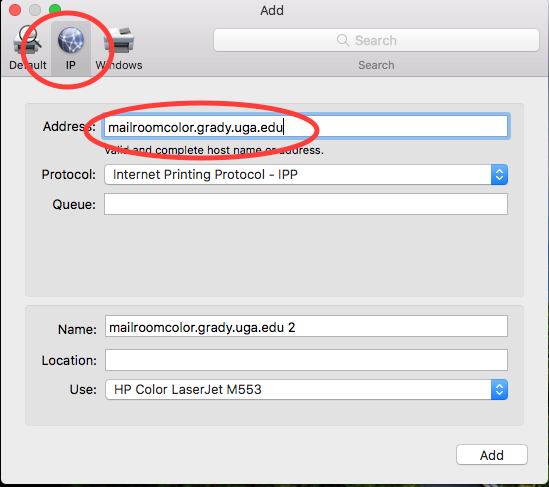
After the Use: are is populated you just need to click Add and you will then have a USB or network printer added to your Mac.
You can’t stop people printing what they want to print. Alan Sugar
(Great tutorial! Passed this on to the advising office and at least 1 other person besides myself was able to use this without asking additional questions! Job well done!)