Author Archives: Don McClain

Adding members to your channels

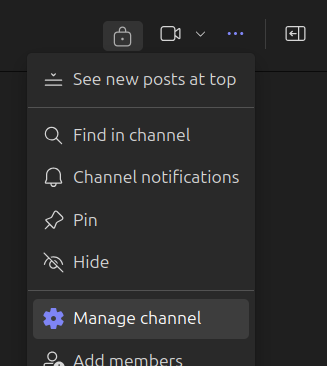
Click on your channel.  Then click on the in the top right next to the camera icon.
Then click on “Manage Channel.”
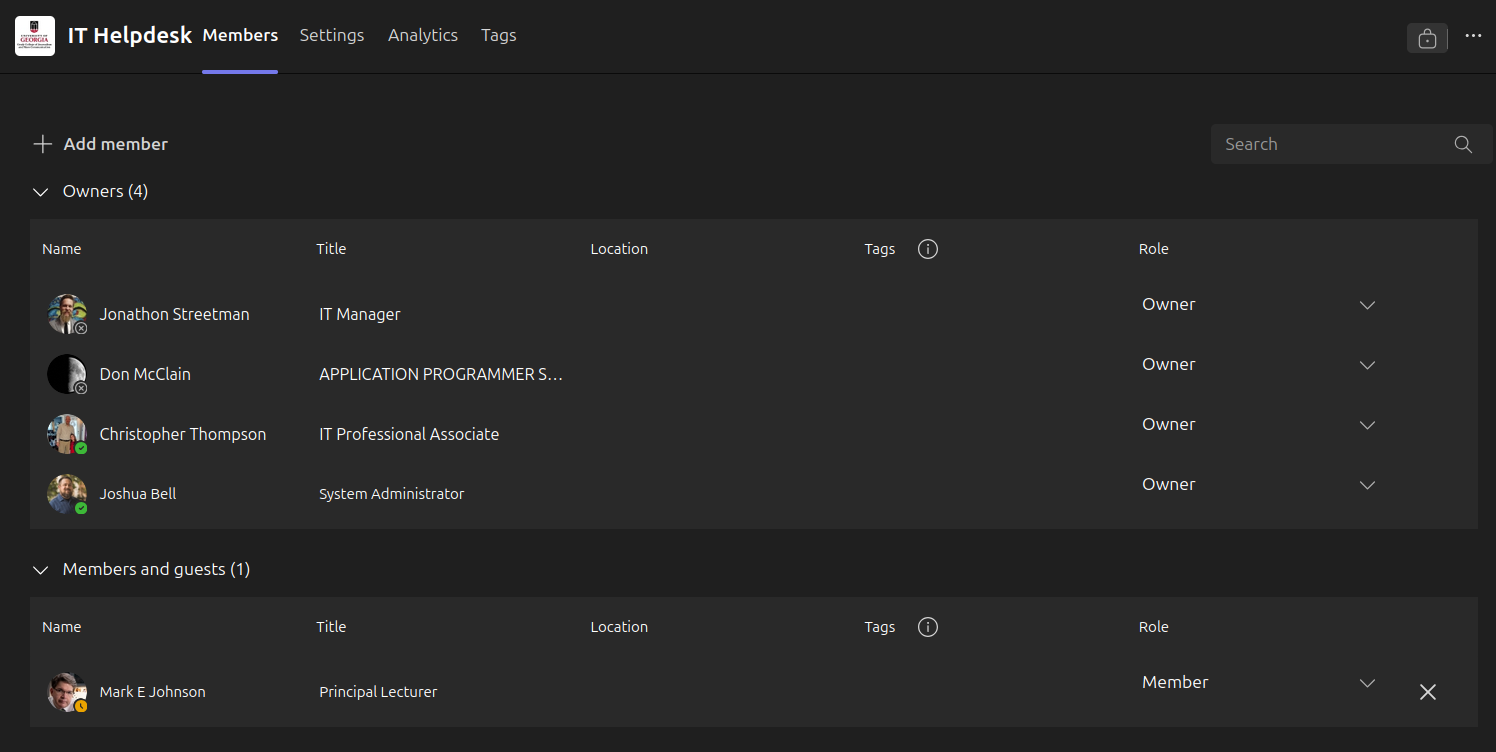
The “Members” Tab should be automatically selected.  From here you can see your channels Owners on the top and Members on the bottom.  Owners can make changes to the channel.  Members can only make changes that affect them.

IT personnel have been added as owners on all channels for support purposes.  They will not be monitoring communications on the channels.  Please do not remove them.

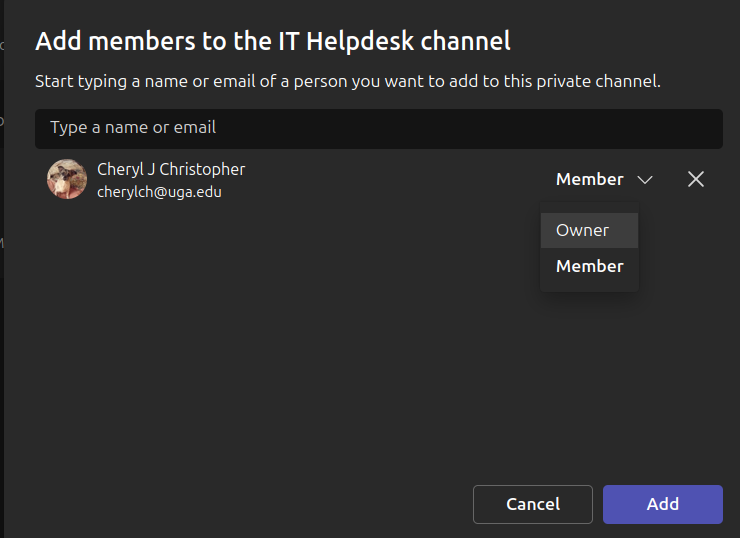
To add someone to the channel click on the “+ Add member” at the top of the list.  Enter the email address of the person you want to add in the search box.  Their account should come up as you type.  Select them from the search and they will be added below the search bar.  Choose their role from the dropdown menu.  Most will be “Members”.  You can keep adding from this box or click the “add” button to finish.
 

Please note members can be removed by clicking the X out to the right of their name.  Owners must be first demoted to Members before they can be removed.
Understanding and enabling notifications in Teams

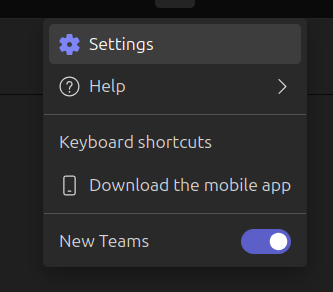
At the very top look for the next to the search bar.

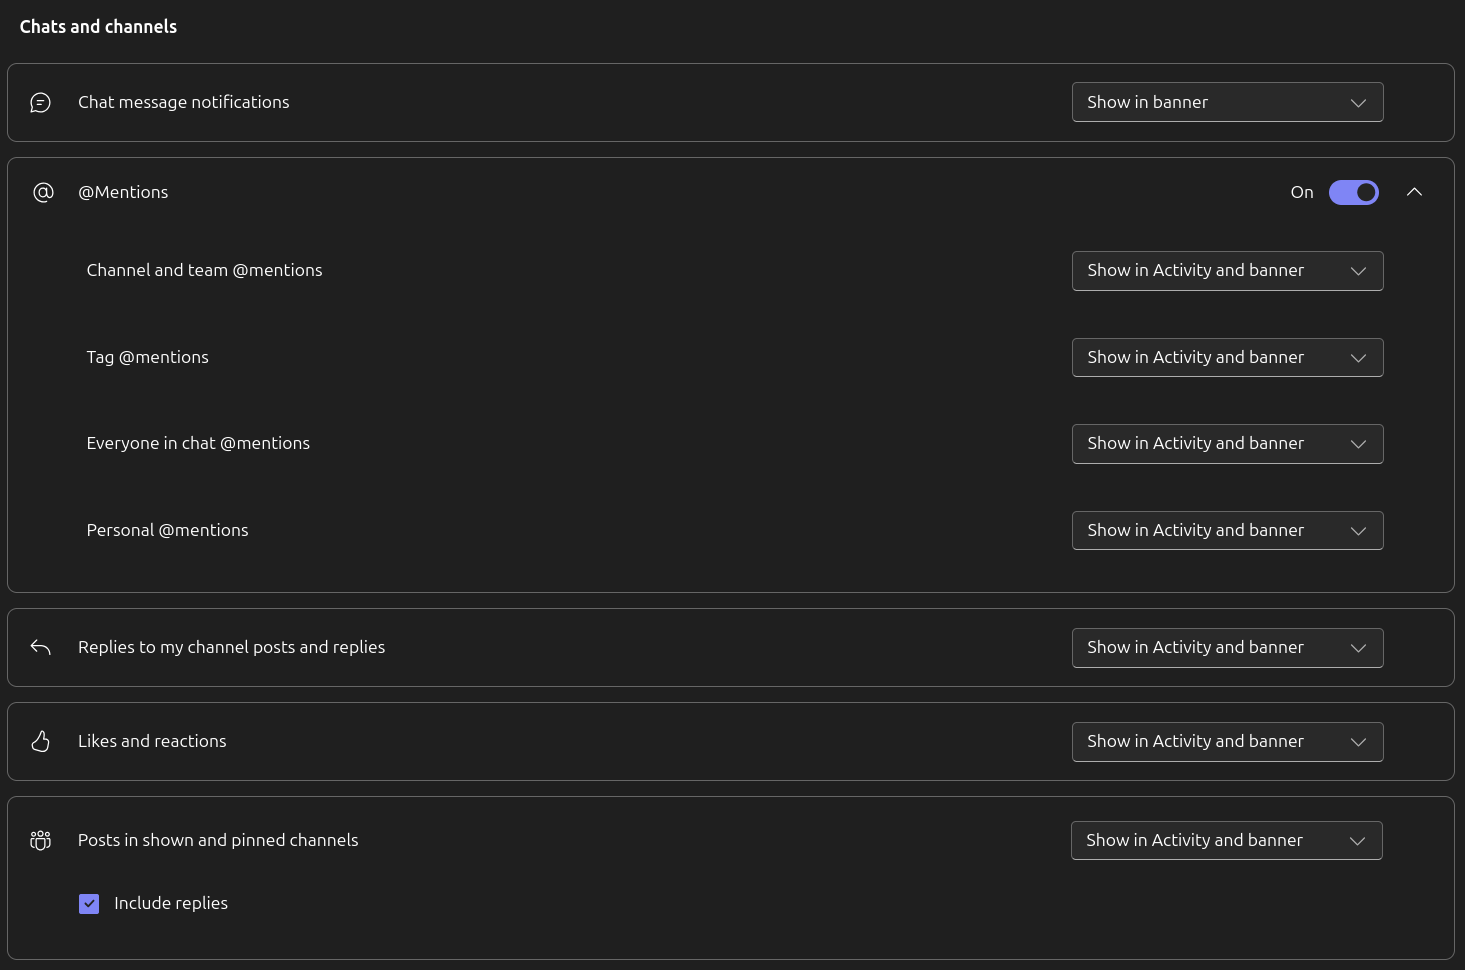
Click on “Settings”.  Once in the settings menu click on “Notifications and activity”.  Scroll down to “Chats and Channels”.  Make sure “Chat message notifications” is set to “Show in banner”.  Make sure all the other options are set to “Show in Activity and Banner”.  Check the box to include replies.  It should look like the example below.

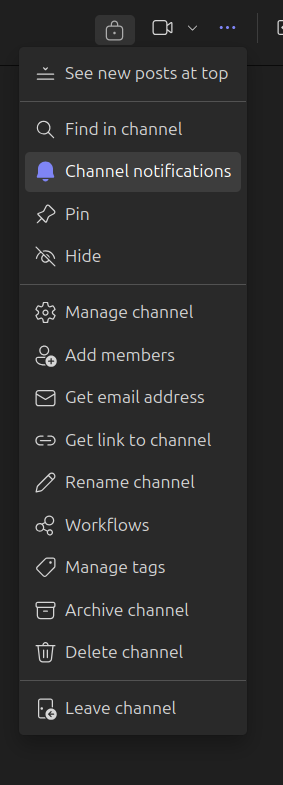
You will also need to enable notifications in the Channels as well.  Go to the channel and click the … in the top right beside the camera icon.  Select “Channel notifications”

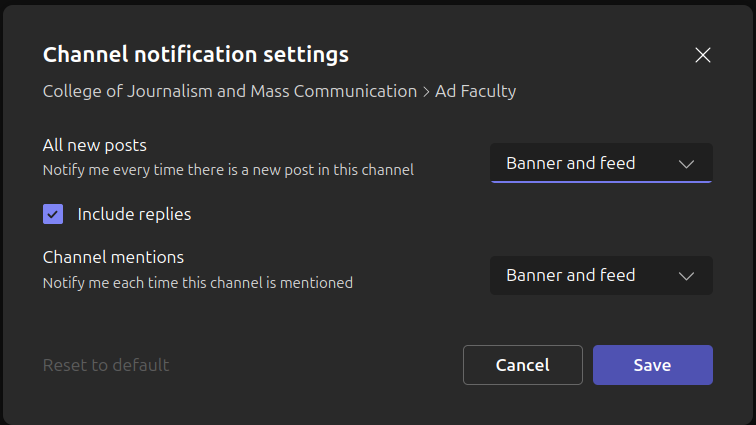
Select “Banner and feed” for both options and check the box to include replies.  It should look like the example below.  You will need to do this again for every channel you are a member of and if you are added to new channels.

Additional information about notifications can be found here.

https://support.microsoft.com/en-us/office/manage-notifications-in-microsoft-teams-1cc31834-5fe5-412b-8edb-43fecc78413d

Join a shared Outlook Calendar

The procedure to join a shared Outlook Calendar takes only a couple steps, but it can look slightly different depending on if you use Outlook’s desktop client or the browser web app:

On desktop clients

Click on “Open Shared Calendar” on the top menu bar when you have Outlook open and are at the calendar screen.

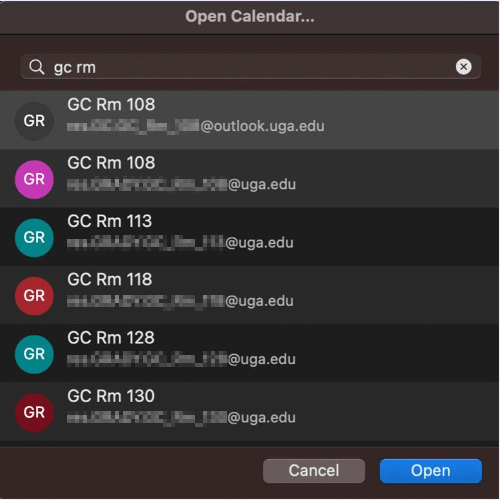
Then type “gc rm” to see a list of Grady College rooms that we have as resource records. From there you can add them to your calendars!

On the web browser app

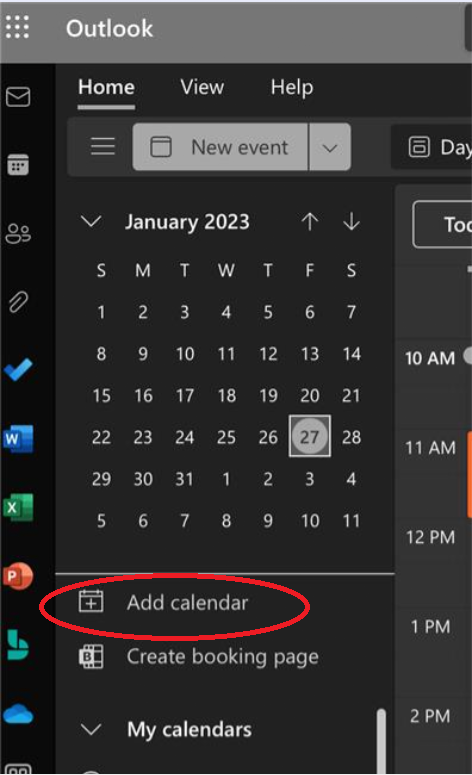
Click the “Add calendar” link under the monthly calendar view.

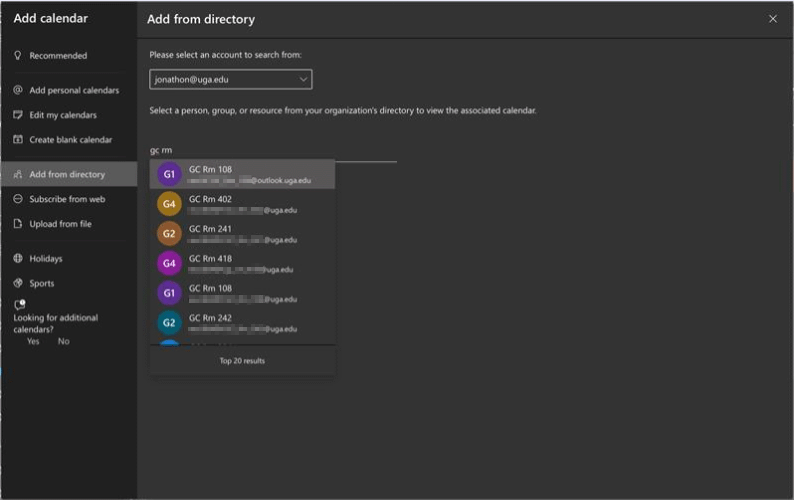
Find your email address in the drop-down menu, then click “Add from directory” in the left menu bar.

Finally, type “gc rm” to see a list of Grady College rooms that we have as resource records. From there you can add them to your calendars!

For more information, check out the Outlook Calendar training and help tutorial.