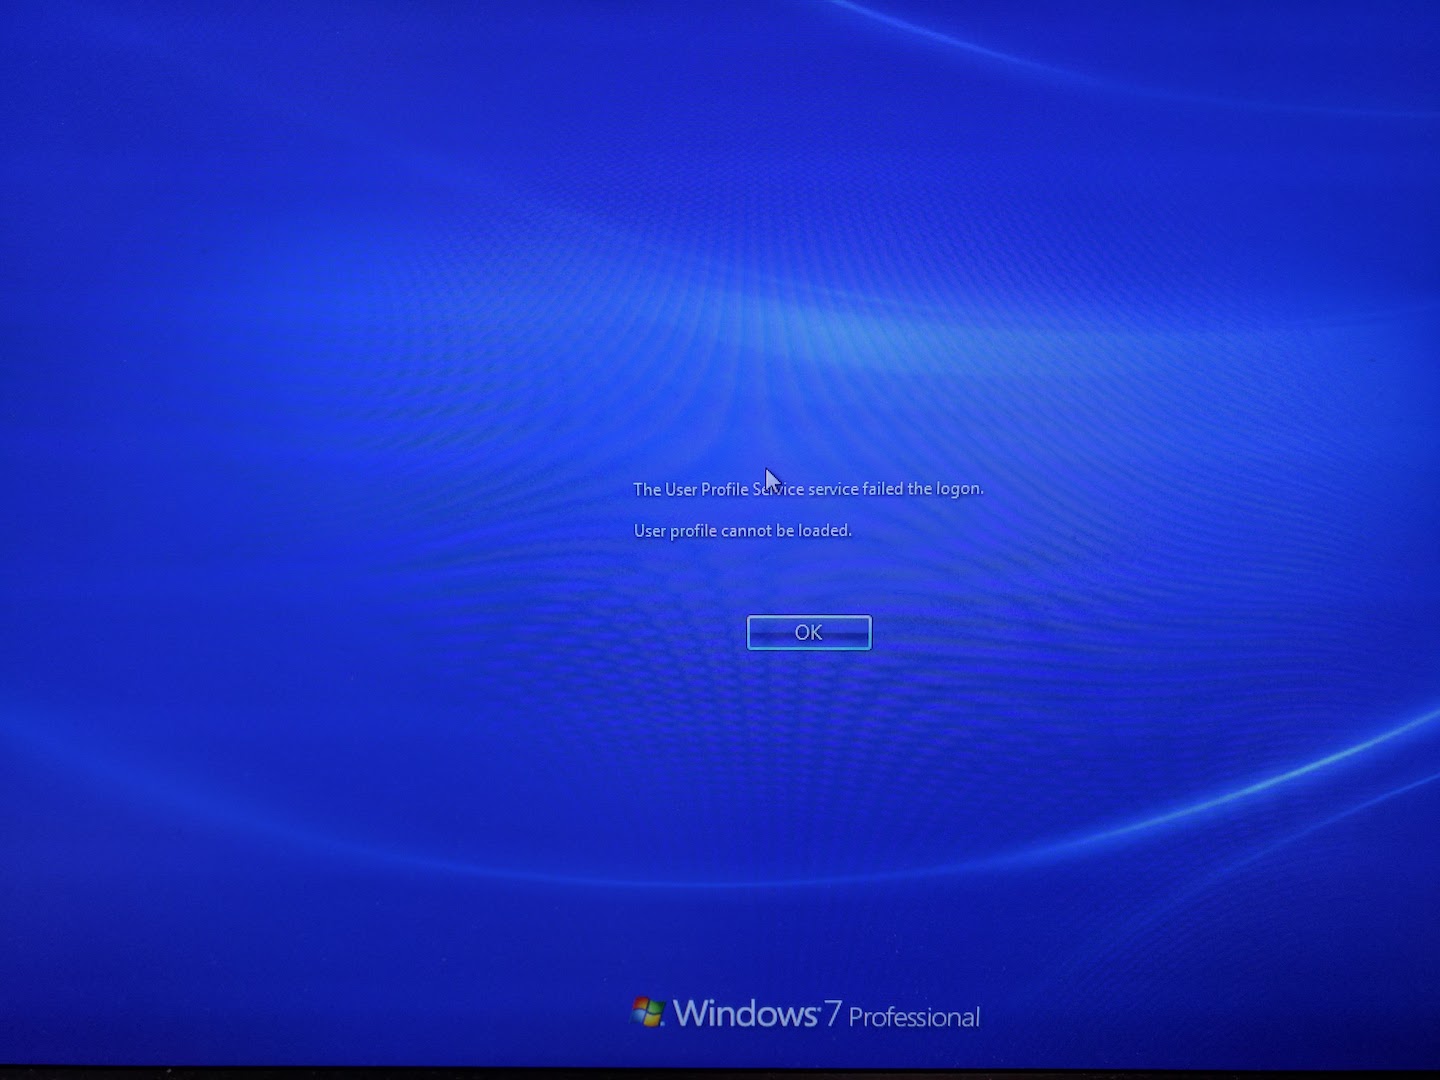
‘User Profile Cannot Be Loaded’ Fix

To fix the user account profile, follow these steps:

Important This section, method, or task contains steps that tell you how to modify the registry. However, serious problems might occur if you modify the registry incorrectly. Therefore, make sure that you follow these steps carefully. For added protection, back up the registry before you modify it. Then, you can restore the registry if a problem occurs. For more information about how to back up and restore the registry, click the following article number to view the article in the Microsoft Knowledge Base:

322756 How to back up and restore the registry in Windows How to back up and restore the registry in Windows
  1. Click Start, type regedit in the Search box, and then press ENTER.
  2. In Registry Editor, locate and then click the following registry subkey:
    HKEY_LOCAL_MACHINE\SOFTWARE\Microsoft\Windows NT\CurrentVersion\ProfileList
  3. In the navigation pane, locate the folder that begins with S-1-5 (SID key) followed by a long number.
  4. Click each S-1-5 folder, locate the ProfileImagePath entry in the details pane, and then double-click to make sure that this is the user account profile that has the error.

    • If you have two folders starting with S-1-5 followed by some long numbers and one of them ended with .bak, you have to rename the .bak folder. To do this, follow these steps:
      1. Right-click the folder without .bak, and then click Rename. Type .ba, and then press ENTER.
      2. Right-click the folder that is named .bak, and then click Rename. Remove .bak at the end of the folder name, and then press ENTER.
      3. Right-click the folder that is named .ba, and then click Rename. Change the .ba to .bak at the end of the folder name, and then press ENTER.
    • If you have only one folder starting with S-1-5 that is followed by long numbers and ends with .bak. Right-click the folder, and then click Rename. Remove .bak at the end of the folder name, and then press ENTER.
  5. Click the folder without .bak in the details pane, double-click RefCount, type 0, and then click OK.
  6. Click the folder without .bak, in the details pane, double-click State, type 0, and then click OK.
  7. Close Registry Editor.
  8. Restart the computer.
  9. Log on again with your account.
Tutorial on Adding a Networked Printer

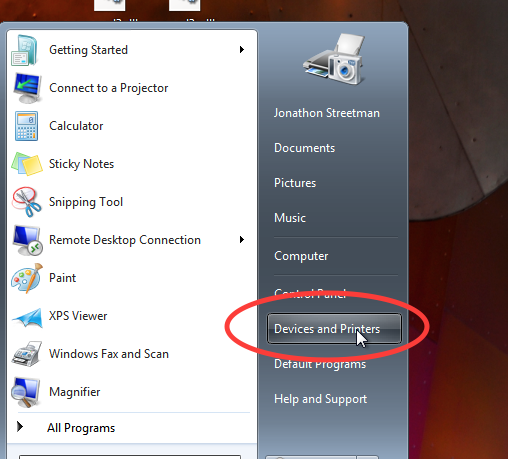
Click Start -> Devices and Printers

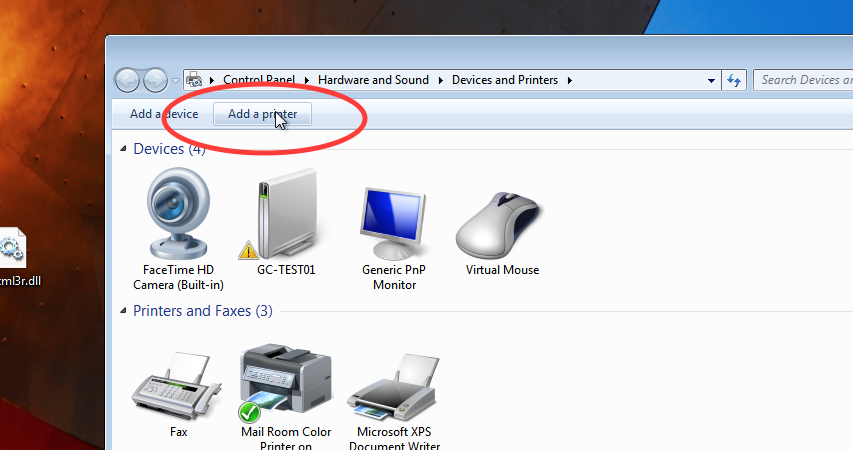
Click on Add Printer

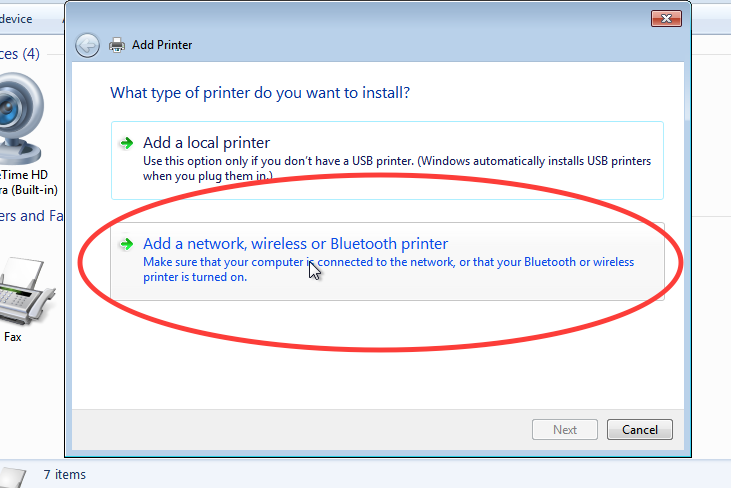
Click on Add a network, wireless, or Bluetooth printer…

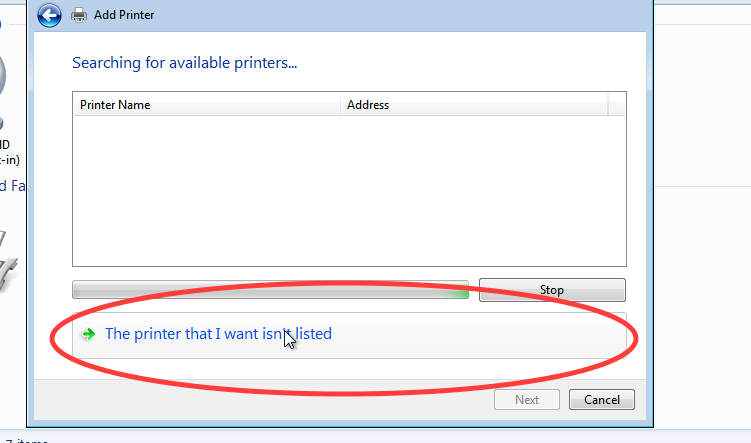
Click on The Printer that I want isn’t listed…

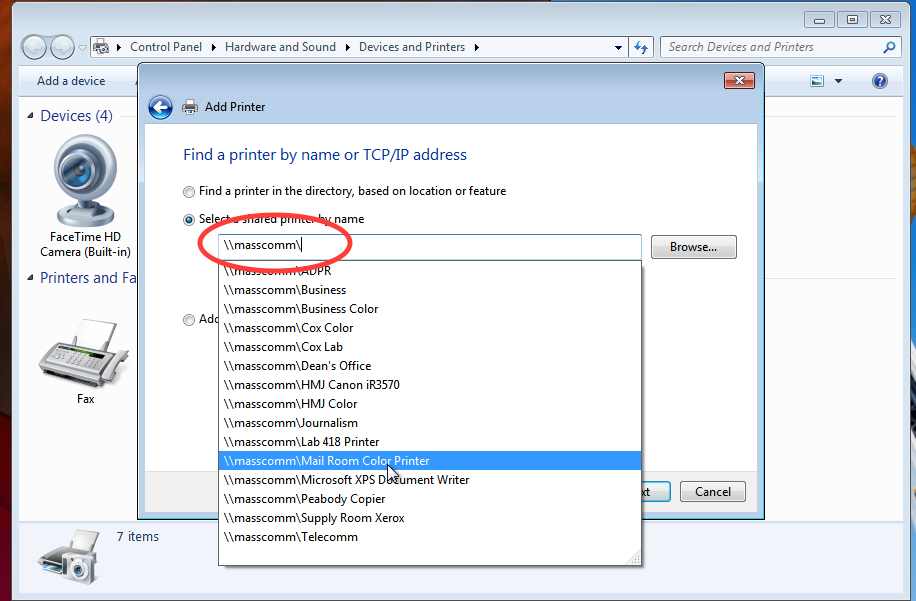
In the box seen above, type \\masscomm\ and you will see a list of the available printers populated.

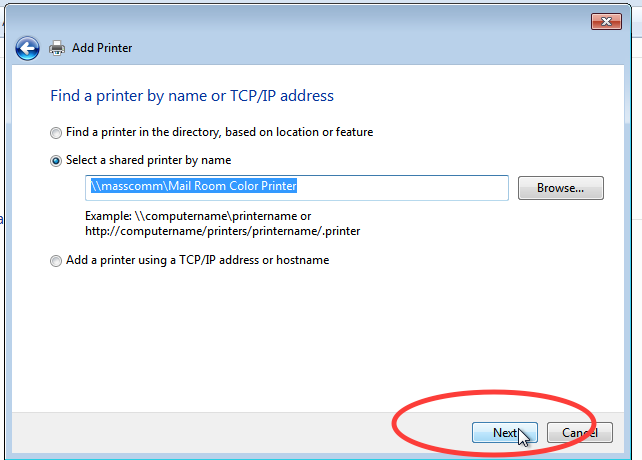
Select the printer you would like to add and click Next.

Follow through the following steps of adding the printer driver and be sure to uncheck “Make this printer my default printer”. After doing this the printer will be added to your computer.


-=MacOS Instructions-=


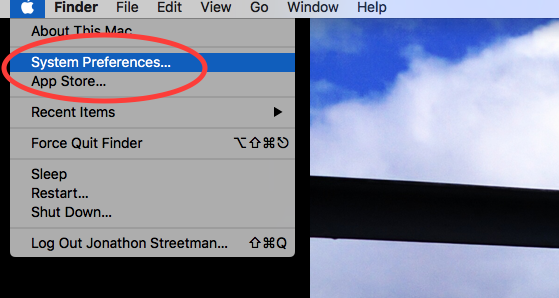
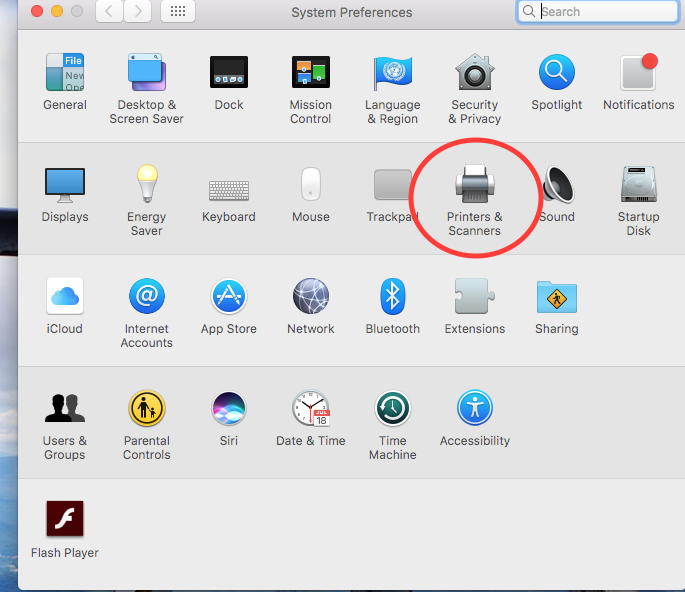
Select the Apple Logo in the top left of your OS and click on System Preferences…

In the System Preferences window that opens, select Printers & Scanners.


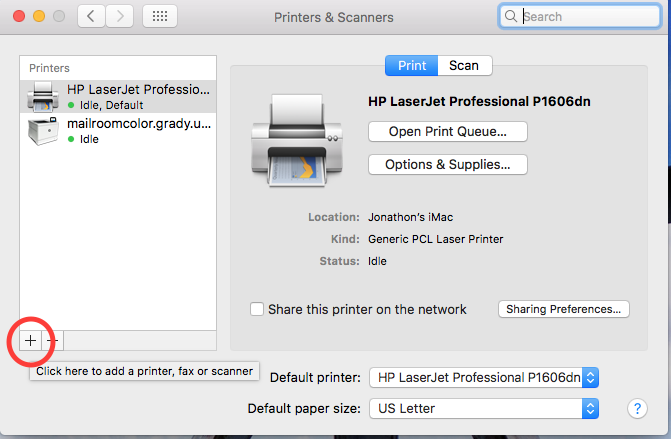
In the Printers & Scanners window that opens, click on the “+” sign in the bottom left to add a new printer.

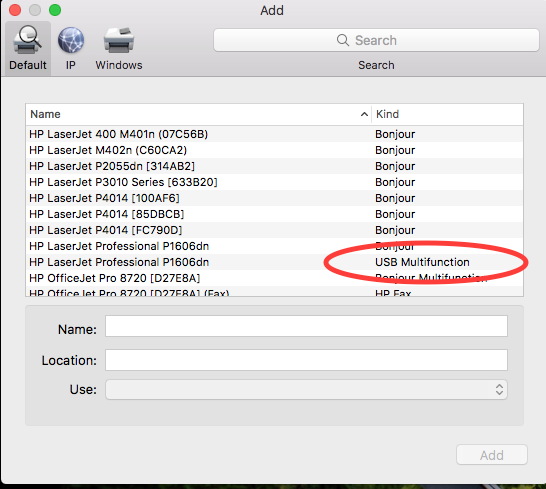
To add a local printer connected via USB (in your office) then you will need to scroll down until you see a printer with your model number listed with the kind of “USB Multifunction”.


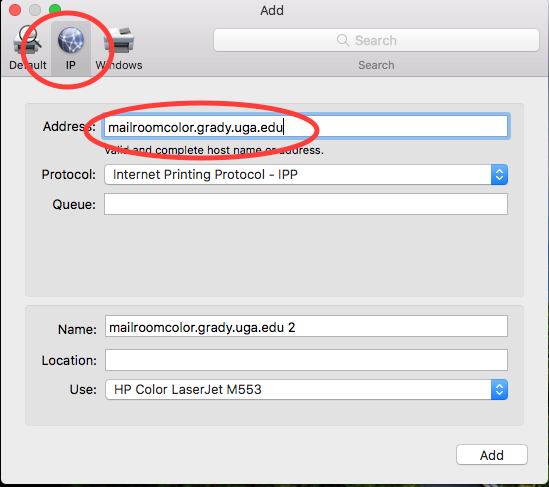
To add a network printer you will need to click the “IP” tab and type in the DNS name of the printer you want to add. The image below has the address the the mail room color printer.


After the Use: are is populated you just need to click Add and you will then have a USB or network printer added to your Mac.


How to set up Remote Desktop access

You can access your work PC remotely. Just make sure that you leave your computer on and you have turned off any power saving features, as it will not wake up from sleep.

If you have a Mac at home you will need Microsoft Remote Desktop from the App Store. Remote Desktop is built into Windows. You will also need to know your computer name, which can be found by right clicking on Computer in the start menu and viewing the computer name there.

On your home computer:

  1. Connect to the Cisco VPN
  2. Open Remote Desktop and put in computer name/address –
    • GC-******.msmyid.uga.edu, where ****** is the 6 digit UGA Property Control number for your computer
  3. Username is MYID\*yourmyid* and password.

You should then connect fine.

Lorem Ipsum

Lorem ipsum dolor sit amet, consectetur adipiscing elit. Proin ultrices arcu in diam egestas gravida. Sed dignissim cursus faucibus. Nam accumsan quam vel consectetur condimentum. Sed quis velit non orci egestas congue. Sed hendrerit tellus ipsum, sit amet aliquam neque varius sit amet. Donec aliquam nulla molestie eros varius iaculis. Interdum et malesuada fames ac ante ipsum primis in faucibus. Suspendisse potenti. Nullam vitae imperdiet odio, et iaculis elit. Vivamus ultricies arcu nisi, in rhoncus libero vehicula sed. Maecenas magna erat, tristique nec varius dignissim, suscipit a neque. Duis eu urna sit amet purus pellentesque rutrum non in tortor.

Pellentesque sed leo ornare justo malesuada gravida in eu urna. Etiam gravida odio arcu, sit amet congue mauris imperdiet eu. Cras ullamcorper tempus pharetra. Suspendisse eu quam in tellus viverra sagittis ut mattis ligula. In ac maximus eros. Sed eu ex molestie felis rutrum bibendum. Sed viverra molestie leo, ultricies faucibus turpis suscipit efficitur. Morbi gravida purus gravida mauris pellentesque, nec aliquam nisl porta. Curabitur in sodales dolor. Vestibulum dapibus sit amet ipsum ultrices rutrum. Donec non arcu ut sem tincidunt accumsan. Suspendisse potenti. Morbi ullamcorper ullamcorper quam eget dictum.

Proin consequat mollis orci. Maecenas scelerisque felis eu nibh egestas consequat. Cum sociis natoque penatibus et magnis dis parturient montes, nascetur ridiculus mus. Nulla nulla neque, porta at ipsum nec, auctor aliquam tellus. Sed interdum lacus nec sapien lobortis, posuere eleifend libero iaculis. Proin vel quam mauris. Aliquam at mauris ac enim porta laoreet id ac tortor. Vestibulum metus elit, pharetra quis nisl ac, facilisis placerat sapien. Aenean sodales erat et metus condimentum, non molestie risus sodales. Duis luctus lectus quis justo iaculis, a tincidunt lacus dapibus. Mauris varius finibus tortor, vel scelerisque urna facilisis ac.

Nulla facilisi. Sed et dui leo. Praesent interdum felis eu venenatis blandit. Duis vel est leo. Phasellus a tincidunt augue, et interdum lorem. Integer eget mi risus. Curabitur tempor porttitor sem, aliquam hendrerit diam ornare sit amet. Morbi tristique a quam viverra mattis. Curabitur id ultrices metus. Aenean ut eleifend neque. Phasellus non massa nec justo consectetur lobortis eu sed mauris.

Curabitur auctor elit vel elit eleifend, at pretium quam ullamcorper. Duis risus diam, ornare eget urna nec, efficitur suscipit felis. Ut erat ante, dignissim eu dignissim viverra, vestibulum sed dui. Curabitur et ante sit amet sapien lacinia fringilla. Fusce non suscipit mi, at mollis tortor. Vestibulum bibendum sapien id mauris maximus ullamcorper. Ut quis egestas enim, in dapibus tellus. Donec vitae orci justo. Mauris ac dolor vel metus pulvinar rutrum. Mauris sit amet nibh venenatis massa pulvinar pharetra.

Sort the Media Library with folders

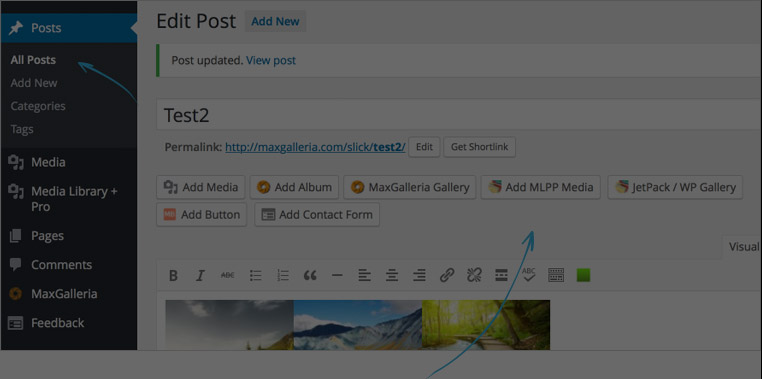
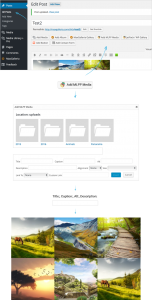
Media Library Plus Pro integrates with the Post and Page editors to let you select and add images to your posts and pages.

MLP Pro lets you create new MaxGalleria and NextGEN Galleries directly from your MLP folders. This is where your images are so it is a logical place to select them and build your Gallery. Creating a Gallery with MaxGalleria comes standard with MLP.

We’ve purchased the license for unlimited use on Grady College sites, email us to request.