
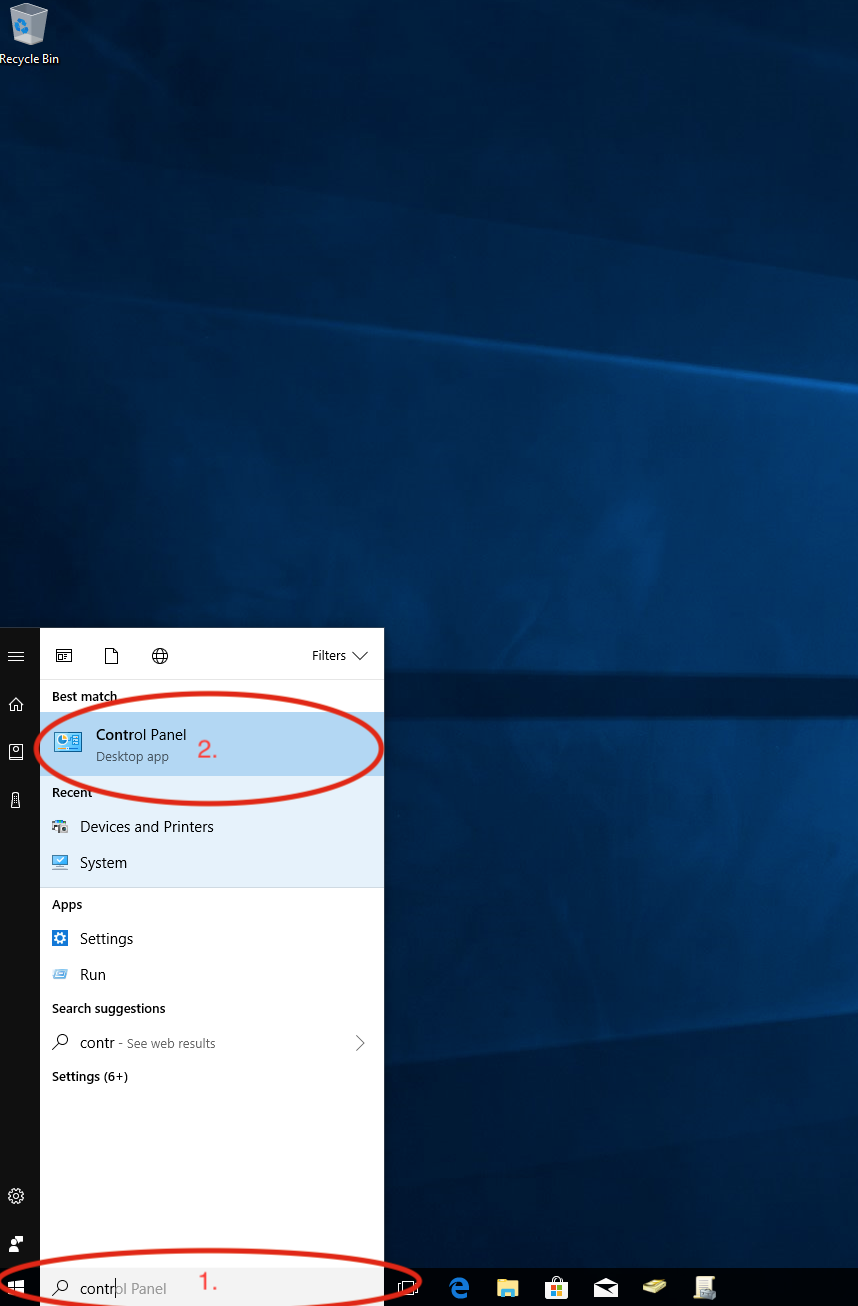
Click the Start Menu in the bottom left corner and begin typing “Control Panel” (1.). When the Control Panel icon appears click on it to open (2.).
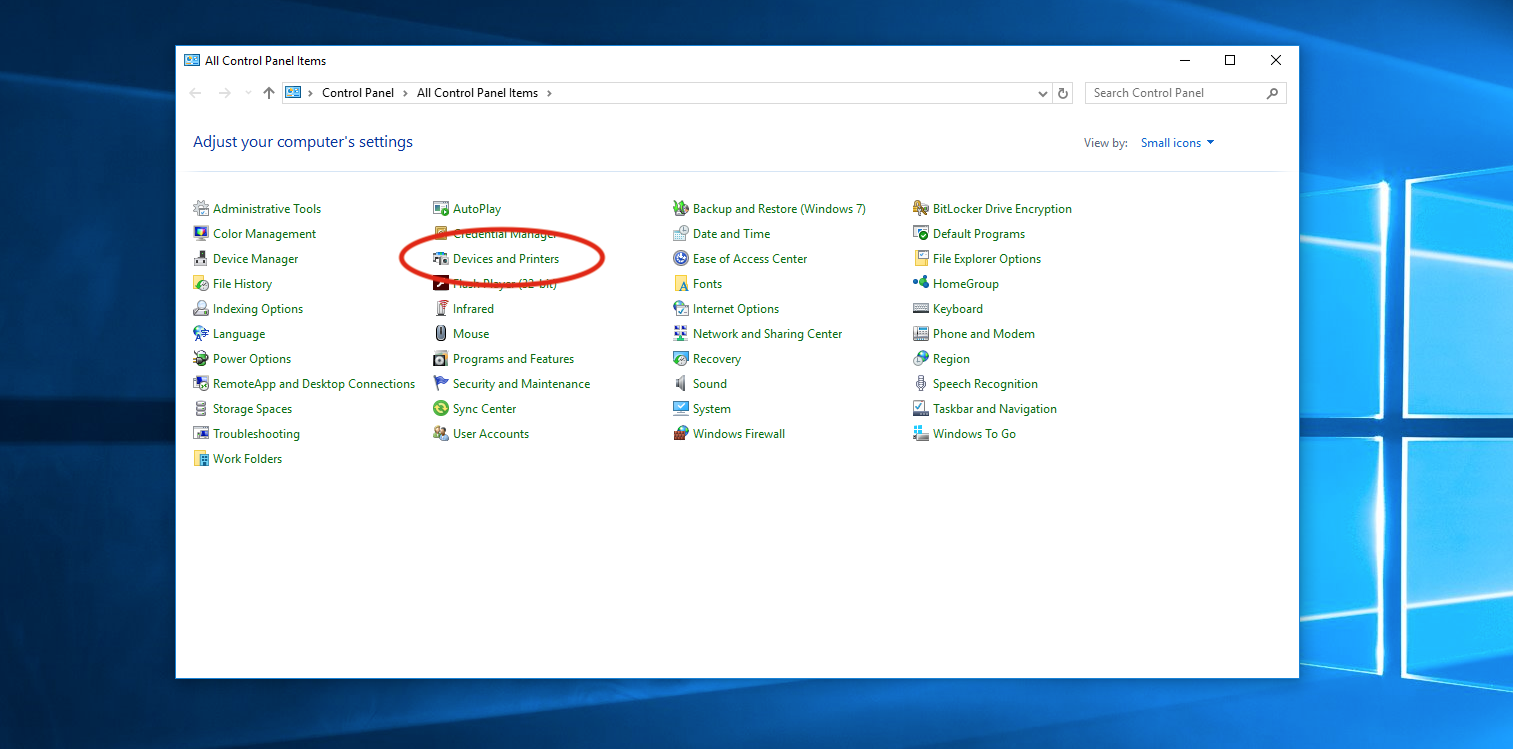
When the Control Panel window appears, click on “Devices and Printers”.
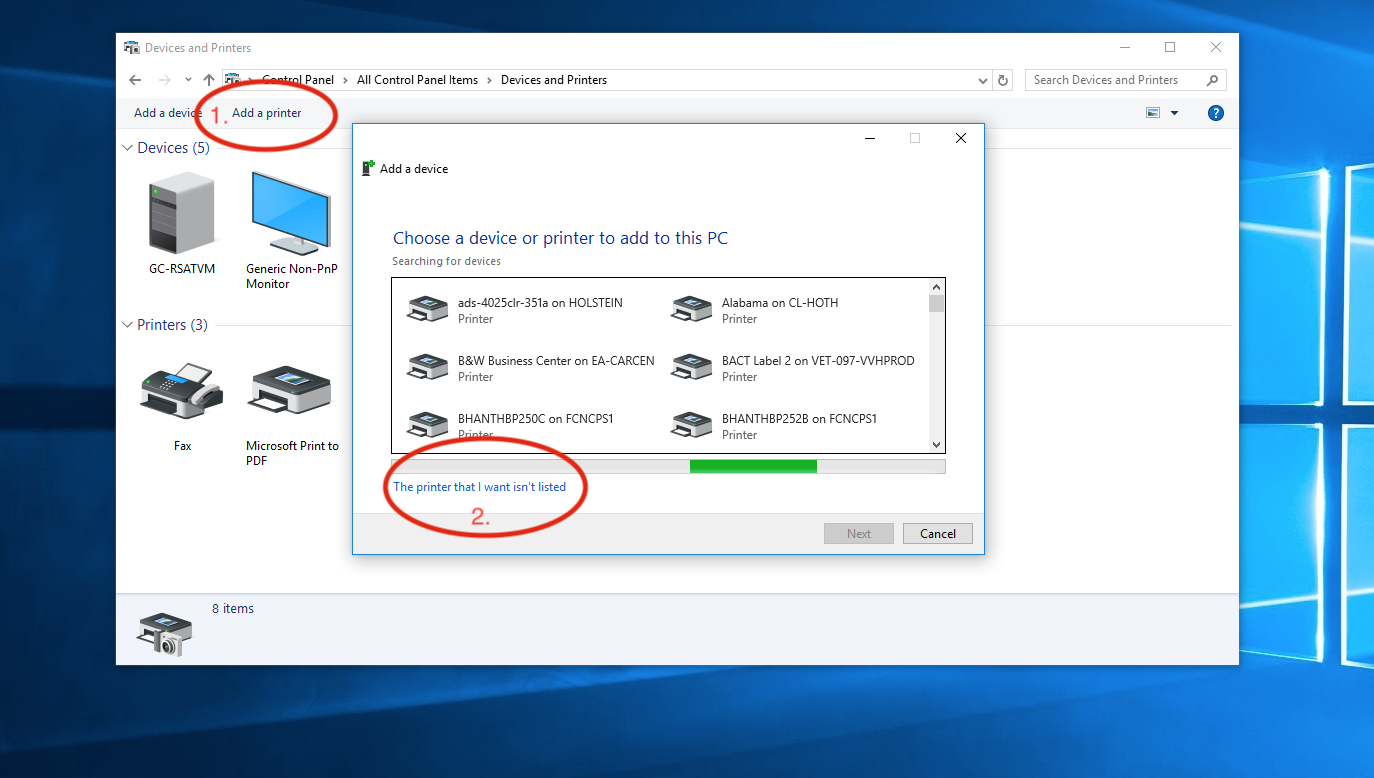
When the Devices and Printers window appears you will click on “Add Printer” (1.). A new window will appear and scan network printers, scroll down the long list to the bottom and select “The Printer that I want isn’t listed” (2.)

In the newly opened Add Printer window you select “Select a shared printer by name” and type in “\\masscommprint\” and a list of shared network printers will appear. Select the printer you want to add to your computer. The printer will now install the drivers and be available for use, just click continue or okay on the prompts that follow.
The Sharp printer is 205supply.grady.uga.edu.
-Jonathon Streetman